Posts in Working In Series
Hooray for Plan B!
22 April 2019 2.jpg

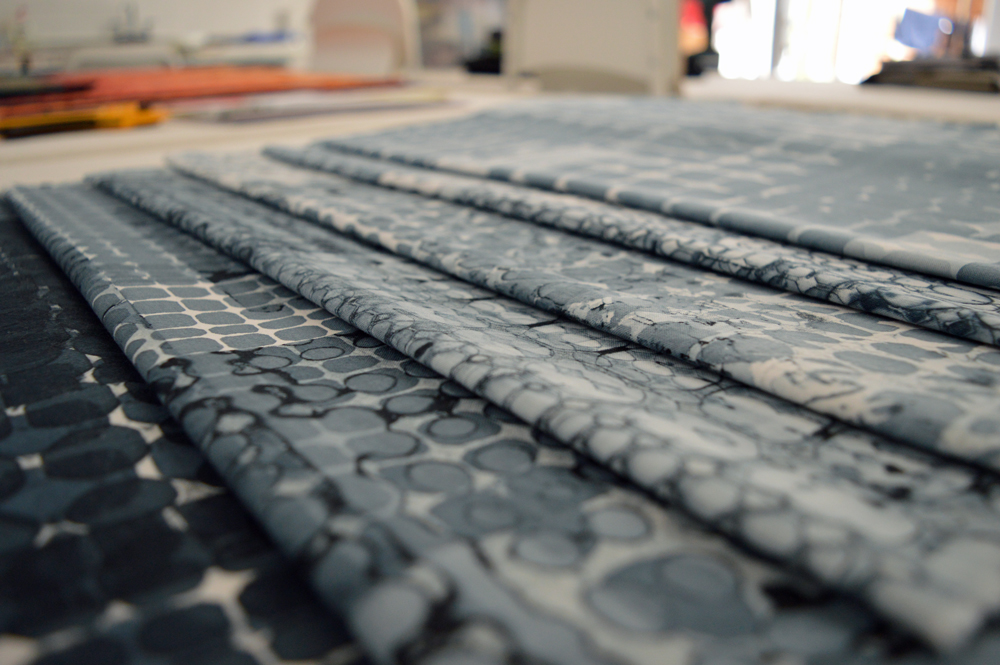
I had a wonderful Easter weekend planned. The weather forecast looked great. Perfect weather for breakdown printing. And so I soda soaked a big pile of fabric and made up some screens to get me started. Brilliant.

22 April 2019 1.jpg

But things don’t always go to plan. On Wednesday afternoon I had a massive hayfever attack that just kept on going into the weekend. I have had hayfever since I was a child although it has become less severe as I’ve got older. And (you will not be surprised) I plan for it. I start taking antihistamines each day from 1st March and these are normally enough to keep it at the ‘snuffly’ nose level through the spring and early summer. This year I got caught out with my first attack in late February so will start taking antihistamines from the beginning of February next year. But even taking extra antihistamines this weekend didn’t help. Which has been very annoying!

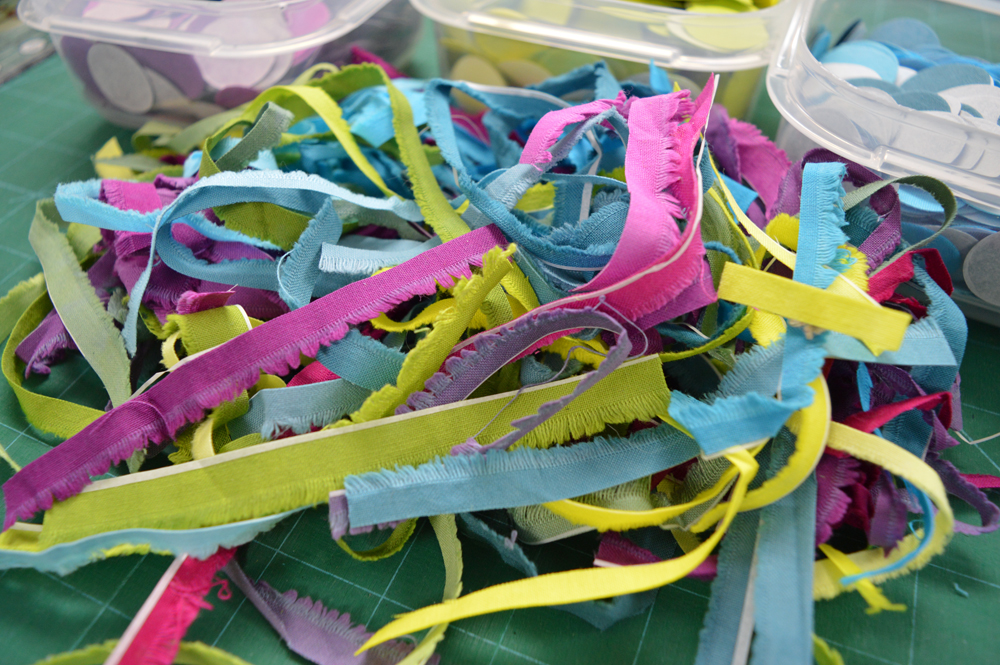
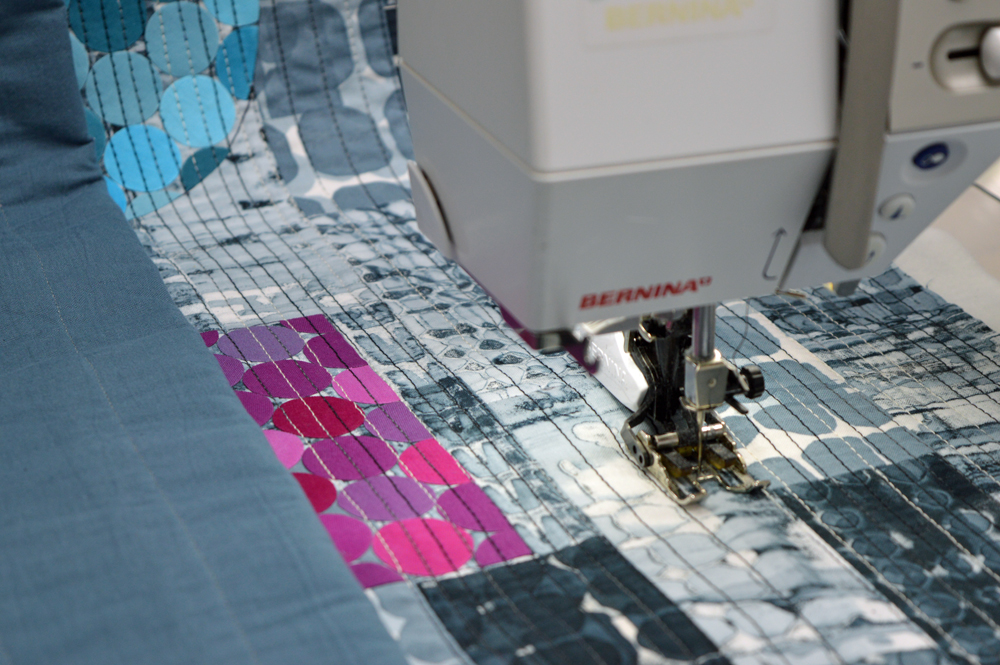
Some people might just take time out but I have an exhibition to get ready for. I knew that it would be hopeless trying to print but I always have a Plan B. That is the joy of working in series and of working on multiple pieces at once. So, in between spells lying down in dark room calming my nose and my breathing down, I have been doing what I call ‘quiet’ work on one quilt. Sat down, drawing out shapes then fusing on hundreds and hundreds of circles. And have been stitching down facings on another quilt. I track my time in the studio and can see that I lost 13 hours compared with the previous week but at least I have achieved some things by switching from Plan A to Plan B! Hooray for Plan B!

22 April 2019 4.jpg
Evolution part 2
7 April 2019 1.jpg

Time to get real ….. I’ve auditioned fabrics and stitched some samples but now I need to commit to a ‘proper’ piece. And for me that inevitably means a large scale piece. Time for a quick drawing on a scrap of paper to work out exactly what size and I’m off!

7 April 2019 2.jpg

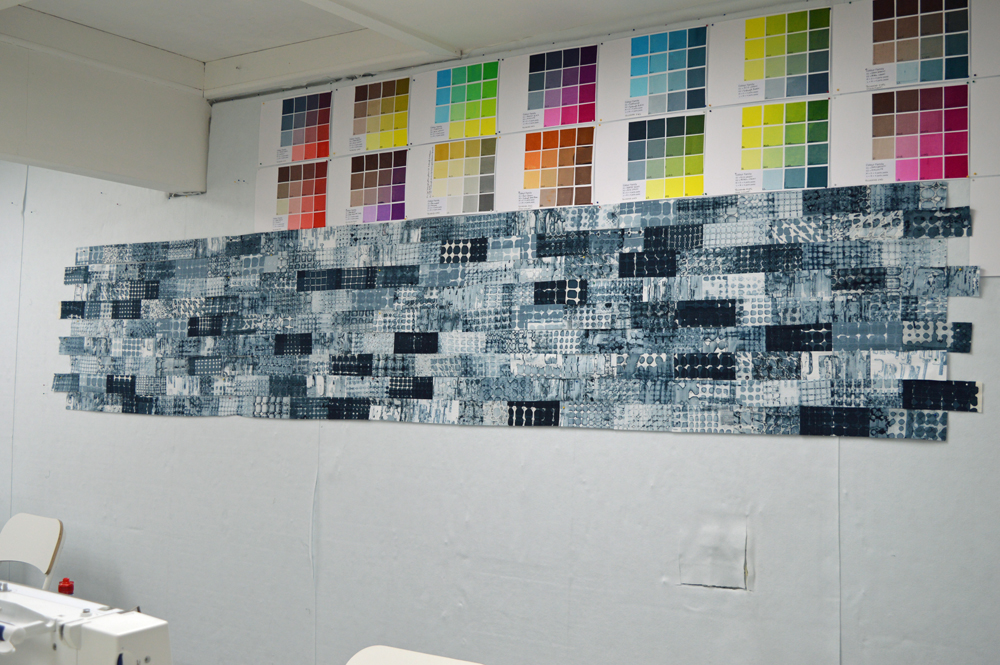
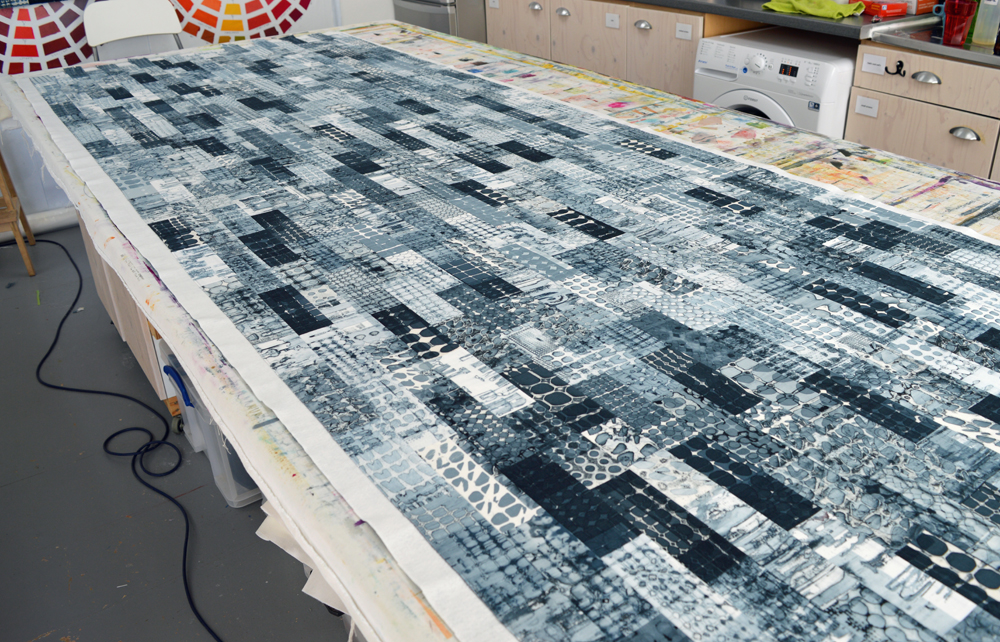
First I take all my beautiful breakdown printed fabrics and cut them into rectangles. I don’t ‘cherry pick’, I just cut everything up. I take the cut pieces and jumble them up then close my eyes and pull them out one by one ready to lay them down in rows on my big print bench. I try to make this process as random as I can. The control freak in me would agonise over this part of the process and would inevitable produce a background that would not be as interesting as when I let serendipity happen.

7 April 2019 3.jpg

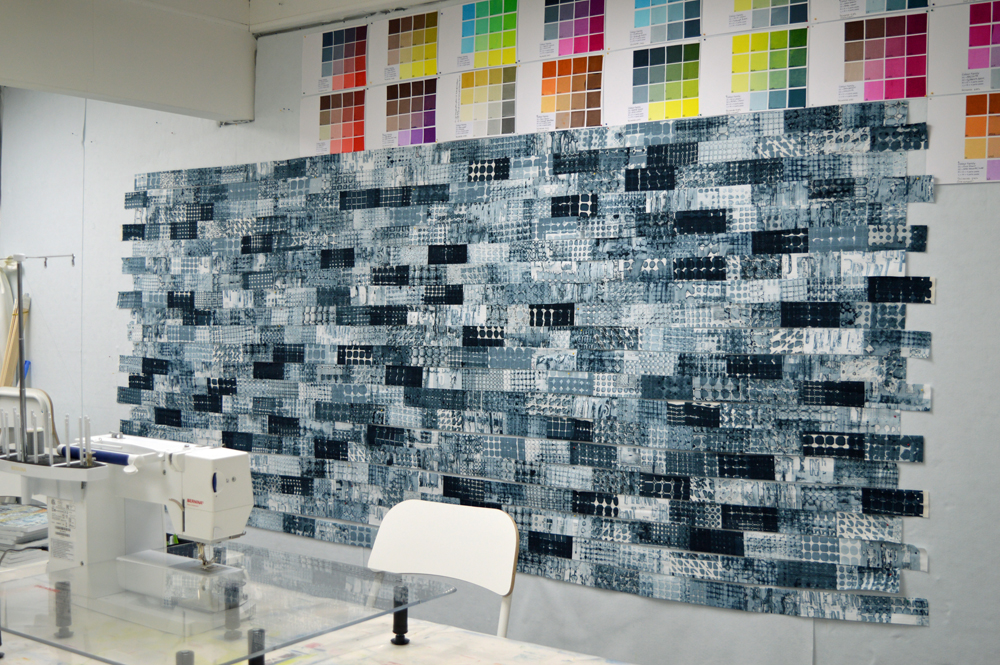
I sew the pieces together into long rows and put them up on my design wall. I like to leave the rows up there for a while and allow myself to change a handful of pieces to balance the colour and composition of the background. Just a handful - I do not give in to the temptation to change too many pieces!

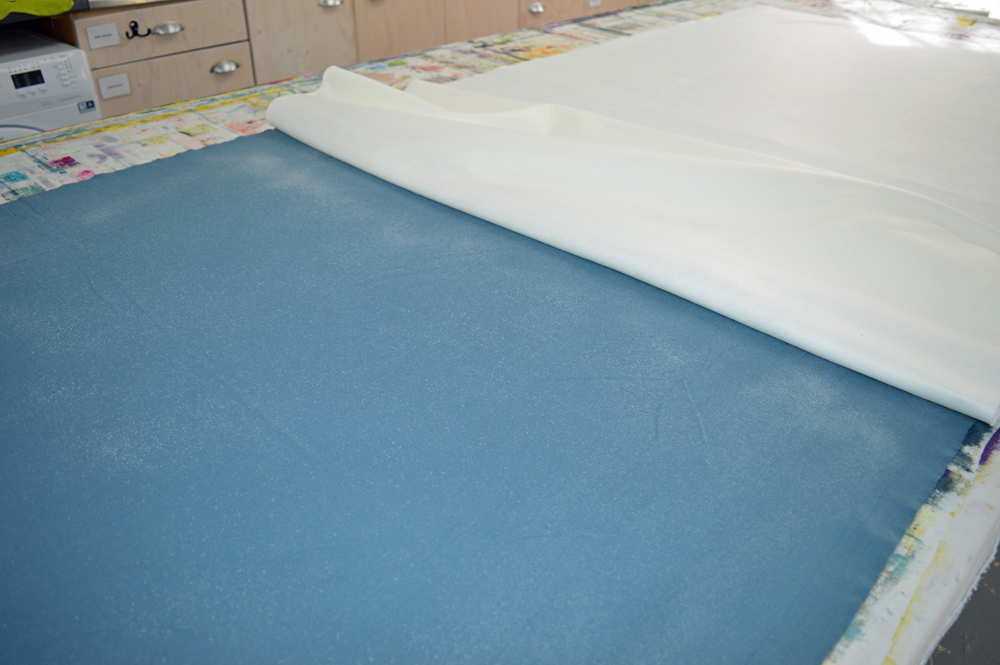
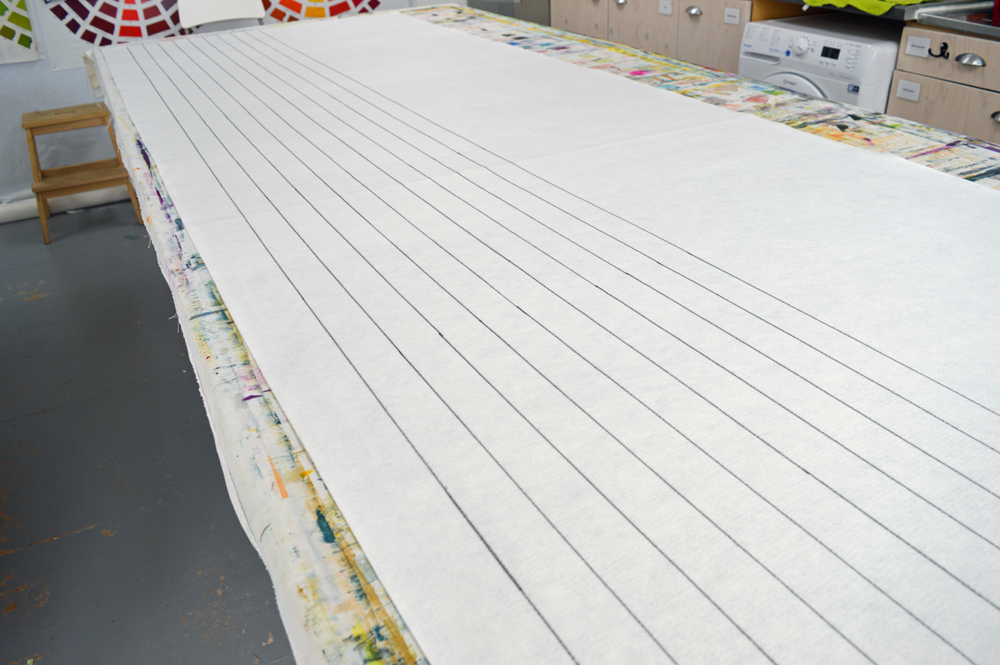
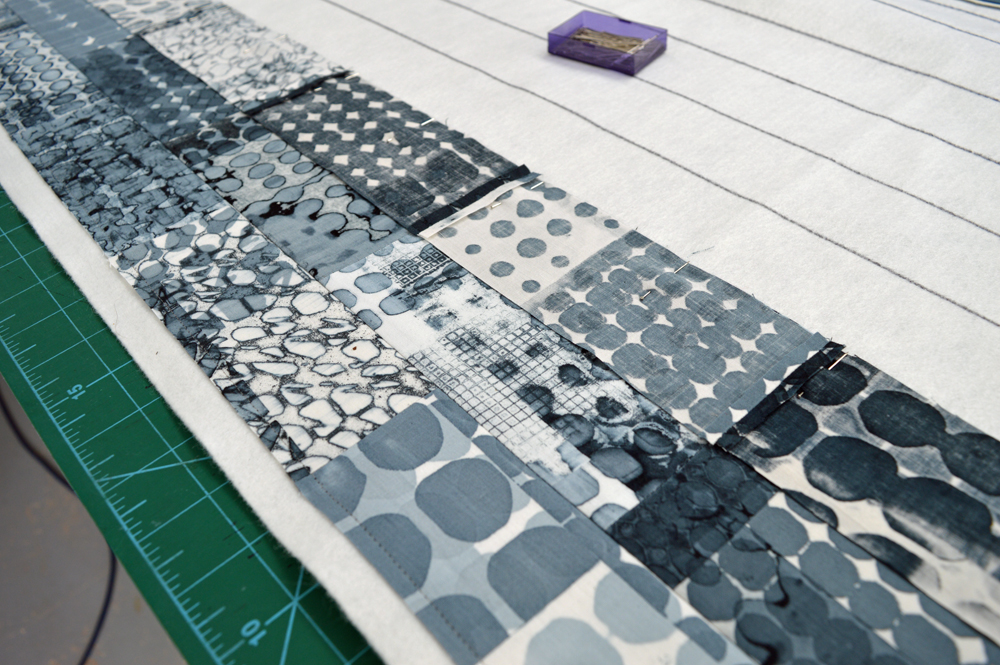
I then prepare my backing fabric and my wadding (I use acrylic felt as I like how flat it is). Having cut them to size I use an adhesive spray to stick them together. I draw parallel lines, 2 inches apart, on my wadding and use a ‘stitch and flip’ process to sew my rows together and to the backing in a single process. This way I can ensure that my rows are sewn together accurately. Yes, I fully embrace my inner control freak for this part of my process! And it has the advantage that I don’t have a separate basting stage. I have always hated basting quilts!

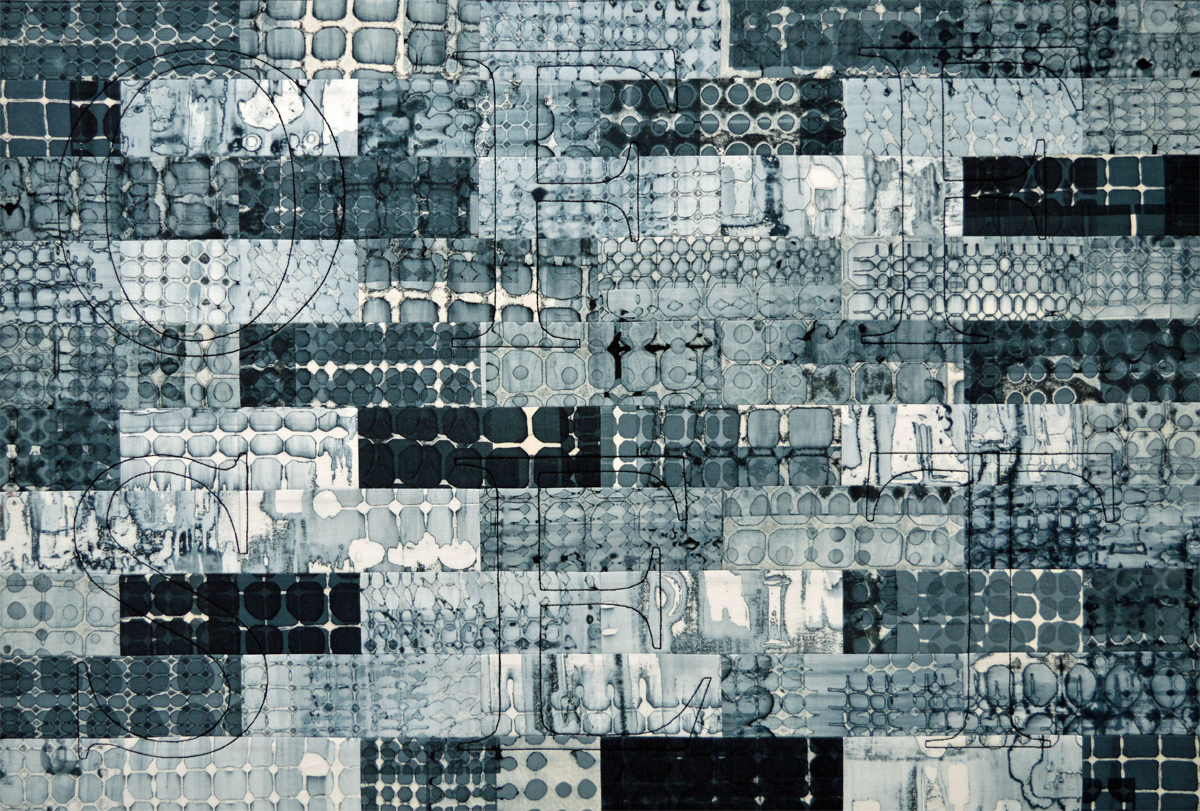
I now have my background. It is ready for me to add what I call my top structures and to add stitch. As with my Ruins series I am stitching lots and lots of parallel lines in my new Print series. I can’t image not adding stitch but at the same time I don’t want the stitching to distract from the fabrics. Simple lines seems to work well with fabrics that contain so much detail. In one of my samples for this series I stitched a word as my top structure. I’ll probably use this idea for one or more of the pieces I will make in this series but for this first piece I had a light bulb moment and have gone in a different direction. And it is a direction that could not be sampled on a small scale piece. Yes my ‘sample’ is 290cm wide by 100cm high and is going to have a prime position in my upcoming exhibition so you only get see these work in progress shots!

There is a saying that fortune favours the brave …. I’m certainly hoping so!

Evolution part 1
2 April 2019 2.jpg

A few weeks ago I wrote a post about my upcoming solo gallery at this summers Festival of Quilts. I’ll be exhibiting new works from three connected series. The newest of the three is inspired by the evolution of the print and publishing industry as it has responded to changes in demand and in technology. As with all of my recent work the ideas evolved in my head and at the bench whilst I was busy working on other things - as I said last time I don’t sit round waiting for the muse! So here is the story of a series that I am calling ‘Print’.

Last summer I took a few days out from preparing my studio (and myself) for teaching to do some breakdown printing. I set myself the challenge of just using black thickened dye in a squeezy bottle to create lots of different grids. I had sort of started thinking about writing my first book and thought this would be a good starting point. I also wanted to create a small breakdown printed quilt to use on my stand at last summers Festival of Quilts. I wasn’t thinking ‘ART’ but as I started cutting into my printed fabrics I was started thinking about the print industry and my connections with it. I made a small quilt which I called Process Colour #1. And went shopping for some old wooden print blocks which I thought I might try to incorporate in ‘something’ … no firm ideas of what but wheels had started turning in my subconscious.

Process Colour #1 blog.jpg

A couple of months later and everything seemed to come together in my head … In my old corporate life I was involved in printing tufted textiles on an industrial scale, in my art life I printed my own unique fabrics. I sometimes use thermofax screens which utilise old technology from the 1950’s. My daughter and her partner have long been involved in the self-publishing / zine movement (check out Good Press). I had spent the autumn trying to get my husband to throw out some very old Gestetner printing supplies 30 years after he used a Gestetner duplicator to print his own zines. And now I was going to self-publish my first book (Breakdown Your Palette). So many connections. And there is so much history when you look at the print and publishing industry. So many changes in technology. Wood block printing to movable type. Printing presses to lithography to inkjet and digital printing to 3D printing. The written word being accessible to the privileged few to mass publication to the growth of the internet and ebooks.

And so I spent another week printing more fabrics. Just using black thickened dye but incorporating embedded wooden print blocks with my grids. Playing with new ideas. Auditioning fabrics. Making a sample utilising thin strips. Promising but still not quite right.

2 April 2019 1.jpg

All more fuel for my mind to mull over. At some point I decided that I would create pieces using the same ‘brick wall’ background as I wanted that connection with my Ruins series. And sampled this as a piece for my Cloth in Common group. In this quilt I stitched the word ‘offset’ on top of a background made using my breakdown printed fabric. Definitely going in the right direction. Which is just as well as I need to make pieces for the exhibition. In my next post I will share the process for making my first large scale piece in this new series. My ideas will continue to evolve as I make each piece …..

1-9Higgins Times New Roman.jpg
Waiting for the muse to strike? No thanks.
Photo by Jon Tyson on Unsplash

Photo by Jon Tyson on Unsplash

We all create differently. Some people positively glow with creativity as a deadline looms; others become paralysed as that dreaded date approaches. Some thrive in a chaotic work space; others get distracted if their pencils aren’t lined up correctly. Some sit in front of a white page or piece of white fabric waiting for the muse to strike; others just get started confident that the ‘muse’ will turn up at some stage. OK, these are all generalisations. We are all individuals and there is no right or wrong way to be creative whatever form that creativity might have.

But self awareness; taking the time to understand and, critically, accept the way that works best for you can make you more productive and less frustrated. This is something that I took the time to think about and I am a much happier ‘creative’ for it. Let’s take the muse / deadline bit first. For me ‘waiting for the muse to strike’ is like waiting for Amazon on Christmas Eve to deliver the thing your loved one wants more than anything in the whole wide world, that you have told them they will get, that they have posted on Facebook that they are getting. Normally your neighbours would take the parcel in but that tried and tested method isn’t working - they have gone on holiday. And so you take a day off work, you get up early just in case, you sit around in your front room as you know your doorbell doesn’t always work and Amazon guy doesn’t hang about long enough to knock twice. And, of course, the first time you nip upstairs to the toilet the doorbell rings and ……

Now I don’t mind sewing on labels and adding sleeves the day before an exhibition starts but I don’t apply for gallery space, let alone announce it to the world without having a plan of what I am going to exhibit and having confidence in my ability to deliver. For me this is made easier because I took a conscious decision a few years ago to work in series and to have multiple but connected series going on at the same time. Even if the newest series is just in my head I am never ‘starting cold’. The thought is just too scary, too uncertain. My ideas evolve as I work, they do not just appear fully formed. I also started logging my studio hours and analysing how long different activities take. I know how long, on average, it takes me to create 1 square metre of finished quilt so I can back calculate when I need to start work on pieces for an exhibition based on how many pieces and of what size that I want to have ready. Or, as was the case for my solo gallery at this summers Festival of Quilts I was able to make a decision to include a few older pieces in order to free up time to work on another, equally important project, in this case my first book.

I also understand, and embrace the fact that I am not productive / creative when surrounded by chaos. A well known quilter once told me that before she can start work on new ideas in her studio she cleans her house. At the time I was still working in a room in our house and I totally agreed with her. Thankfully when we built my studio at the bottom of our garden the need to create in a clean tidy space transferred to the studio. The house could be an absolute pig-sty but so long as my studio was clean I was happy and productive.

When I was getting ready for my exhibitions with Helen Conway last year the studio was all mine. Messy was a few threads on the floor and a dirty coffee cup in the sink. But now I share my studio with my students and I have had to figure out how to ‘work’ in a different space. Turns out I need to clean up everything after a class before I can settle to create my own art …. even a pile of dirty drop cloths in the corner waiting to go through the washing machine bothers me (solution = dump them in front of the washing machine in the house!). Turns out I also need to move the tables around. Physically pushing the student benches together to create one big table switches my brain from teacher mode to artist mode. Yep, self awareness is a powerful thing!

Over the next few months I will be moving the tables around a lot!

Breakdown Printing
3 November 2018 1.jpg

It may be cold and grey outside but it is artfully grey inside! I’ve spent this week breakdown printing using squeezy bottles and wooden printing blocks. All in one single colour - grey. The humble squeezy bottle is such a useful tool. I have collected a range over the years with different size nozzles so I’ve been able to play with scale when using them to draw grids on my screen. And by varying the strength of the dye I have been able to play with value. I’m slowly building a palette of printed fabrics to use together.

3 November 2018 4.jpg

This is the first time I have used wooden print blocks with breakdown printing. I’ve tried a couple of things. Using them to stamp thickened dye onto the screen is quick and easy but it doesn’t get much dye on the screen so I’m only getting 1 or 2 good prints per screen. This would be OK in the summer when you can dry screens really quickly but much slower in the winter. The other way I have used them is to embedded them into a layer of thickened dye. Sometimes on their own. And sometimes combined with a grid on the screen. This shows much more promise.

I love this stage in developing a new series of work. Playing with new ideas. Auditioning fabrics. Stitching samples. Figuring out what is missing and going back to the bench to print more fabric. Figuring out if I need to include fabrics made using other surface design techniques. Who cares if it is cold and grey outside!

And whilst I wait for screens to dry I have been adding workshop dates to my calendar. There are only 3 places left on my Breakdown Your Palette workshops in 2019 so I have just added 2 workshops in 2020. How crazy is it to be planning that far ahead! The sessions are on 18th to 22nd May 2020 and 22nd to 26th June 2020. Details can be found here.

I’ve also added new dates for my 1 day a month Introduction to Surface Design course and over the next couple of weeks will be announcing some new 5 day workshops and, very excitingly, workshops with some wonderful guest tutors. Life is good. Now back to my bench!

3 November 2018 3.jpg
Just itchin'
28 October 2018.jpg

I have an itch. I can feel it growing inside of me, gaining momentum. It’s at the edge of my consciousness now whatever I’m doing. It needs scratching!

Yep, all the ideas about a new series of works on the printing and publishing industry that have been brewing in my head for weeks have started to come together. This is how I work. I don’t use sketchbooks when developing new ideas but I do like to have something pinned to my design wall or sat on my desk that is always there, in the corner of my eye, as I work on other things.

I started thinking about printing and how it has, as an industry, changed and continues to change when I printed some fabrics using simple grid based breakdown screens in July. I made a small quilt called Process Colour for my stand at Festival of Quilts expecting it to be a one-off. But I don’t think it’s going to be. Actually I know it isn’t going to be. I liked how the simplicity of a grid become complex it broke down. I liked printing in only black. I cut some thin strips of the printed fabrics. There is no text but they somehow remind me of newsprint. And so my mind has continued to churn ideas around.

I thought about introducing text on top of some of the fabrics using old wooden print blocks. I wasn’t sure how but I’ve had the blocks sat next to my computer for a while now and they have been the catalyst that has caused an ‘idea’ explosion in my head. I need to get the ideas out. I need to play. I need to print!

7 days of bliss
Assessing fabrics against Vestiges, a tiny Ruins piece, in the top right hand corner.

Assessing fabrics against Vestiges, a tiny Ruins piece, in the top right hand corner.

Maybe I am just easily pleased but the last 7 days have been wonderful! I set my teaching ‘stuff’ aside and have immersed myself completely in printing (and dyeing) fabrics for the next pieces in my Ruins series. I also took the opportunity to include a couple of lazy mornings and have ‘allowed’ myself to finish early in the evenings. Frankly I have been working long days in recent months to get the teaching / studio launched and needed a little holiday.

I also needed to get back to making art and this has been the kick start I needed. Lots of September sunshine helped dry breakdown screens quickly and meant that I could soda soak and dry fabrics easily. A couple of pieces still need to batch overnight, and I have a small mountain of fabric to rinse, but I am a very happy artist today. I have printed / dyed about 20 square metres of fabric. I may need to tweek the colour balance slightly but I have the basis for the Ruins pieces that I will be creating for my solo exhibition at next years Festival of Quilts.

Although breakdown printing is the back bone of the Ruins series I have always included other surface design techniques. My work can be quite incestuous - I take photos of breakdown screens and breakdown printed fabrics and use them to create thermofax screens which then get used to print more Ruins fabrics. Love it!

I need to get back to teaching ‘stuff’ and a building project next week but I’ll be leaving all my new fabrics pinned up on my design wall to inspire me!

30 Sept 2018 4.jpg
30 Sept 2018 2.jpg
Back to work Leah!
RUINS 9 Detail.jpg

My focus for the last 5 months has been on teaching - developing workshops, refitting my studio and, finally and wonderfully, greeting my first groups of students. But I was an artist before I was a teacher and now I need to get back to making art.

Fortunately for me I have a great big carrot - a solo exhibition at next years Festival of Quilts. Installation will be on the 31st July. Which is 314 days away. Only 314 days away. Oh heck.

The exhibition will be titled Deconstructed and will be a continuation of my obsession with breakdown printing (also known as deconstructed printing) and industrial heritage. When I put together the proposal about a year ago I knew exactly what I wanted to do with one half of the exhibition - new pieces in my Ruins series that will reference the cotton industry once so important to Manchester (where I live). But I was, and still am, a bit more fuzzy about the other half. I haven't has much time since then to work on my ideas. That needs to change.

Over the next few weeks I will printing a whole bunch of 'ruins' fabrics. I'm hoping that this will ease me back into artist mode. 314 days and counting! oh heck!

Fully stretched
7 April 18 1.jpg

With the Stockport exhibition opening on 26th May it has been full on production at Studio Leah this last couple of weeks. I have been finishing a collection of 10 panels, each 40cm x 100cm, and each referencing a specific coal pit from the Lancashire and Manchester coalfields. These are part of my Traces series inspired by industries and industrial structures that no longer exist; that have been wiped clean from our landscape. Each piece is finished by stretching over a deep canvas. To help achieve crisp corners I did not use any wadding. Instead I fused two layers of cotton together which gave me a good firm surface to stitch on and a fabric that did not skew and distort as I stretched it over canvas. A few people have asked how I do the stretching so here we go.

I use stretched canvases rather than stretcher bars as the canvas manufacturer has done all the hard work by stretching the canvas onto the frame. All I'm doing is wrapping my piece around it - I am not really 'stretching' the work. Looking at the above photos from top left to bottom right:

  • I prepare the canvas by adding double sided sticky tape to all four sides of the canvas and to all four edges on the back of the canvas. If I were stretching over a standard (narrow) canvas I wouldn't bother with tape on the sides.
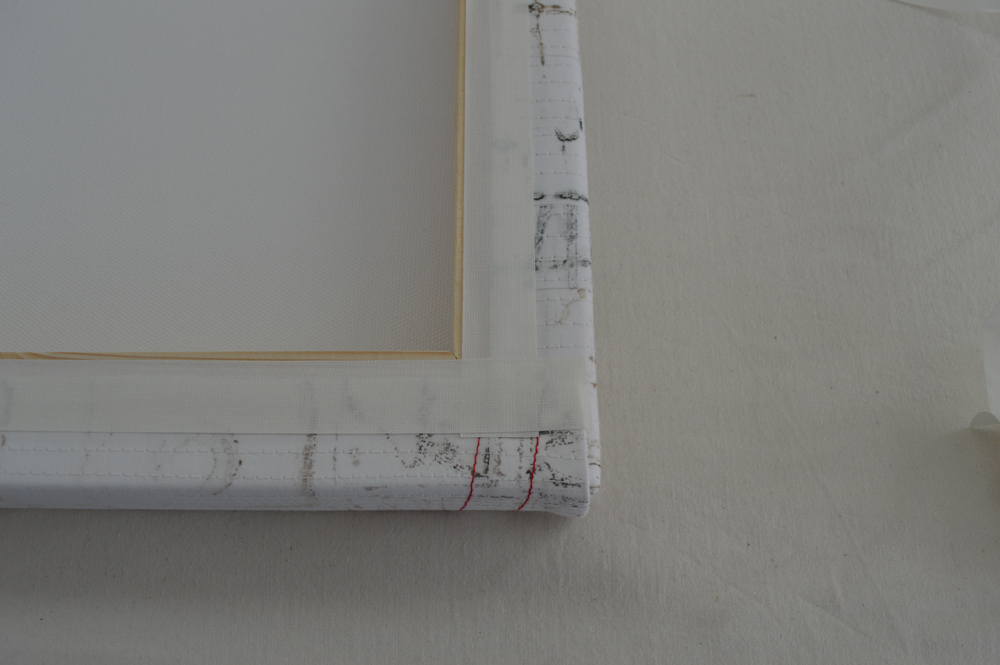
  • I position the canvas on the back of my piece and mark around it with a pencil. I then trim my piece such that there is enough left to wrap around the edge of the canvas - in this case my canvases were 1.5 inches deep so I trimmed to give 2.5 inches all around. I also trim away part of the corner section to reduce the amount of 'bulk' at the corners. I leave about 3/8th inch of the corner - look at the photo to see. This leaves me with a 'flap' on each side.
  • I spray the front of the canvas with a little 505 basting spray and re-position on the back of my piece. The spray is just there to prevent the canvas slipping. With one long edge facing me I remove the paper strip from the double sided tape on the side of the canvas and start lifting my flap up onto it. I start from the centre and work to towards the corners. You don't need to pull hard, just enough that the piece is a snug fit to the side of the canvas. 
  • I then remove the paper strip on the back of the canvas and flip my flap over and down working from the centre out towards the corners. Again you don't need a lot of force. Once in place I finish by adding some staples. You don't need many as the tape does most of the work. I repeat this process on the other long edge.
  • This is the most important part and probably the hardest to describe! I tend to get on my knees so that the short end of the canvas is at my eye height. I remove paper strips from both the side and the back of the canvas. I turn the excess fabric (that 3/8th inch) from the side wall of the long side of the canvas around onto the side wall of the short side and stick it to the tape. As you turn this edge it naturally turns the edge of the short edge flap under. I then lift the short edge flap up and over the edge of the canvas tucking in the excess from the top of the side flap as I go. I pull the flap tight and fix in place with a couple of staples. I repeat at the other corner. I then go along the short edge lifting and sticking down the rest of the flap. I do the same for the other short edge.
  • Because fabric can fray, and because I am a neat freak I finish my canvas by adding a linen effect self adhesive tape over the fabric edges on the back of the canvas. I then sign the back of the canvas and add a business card.

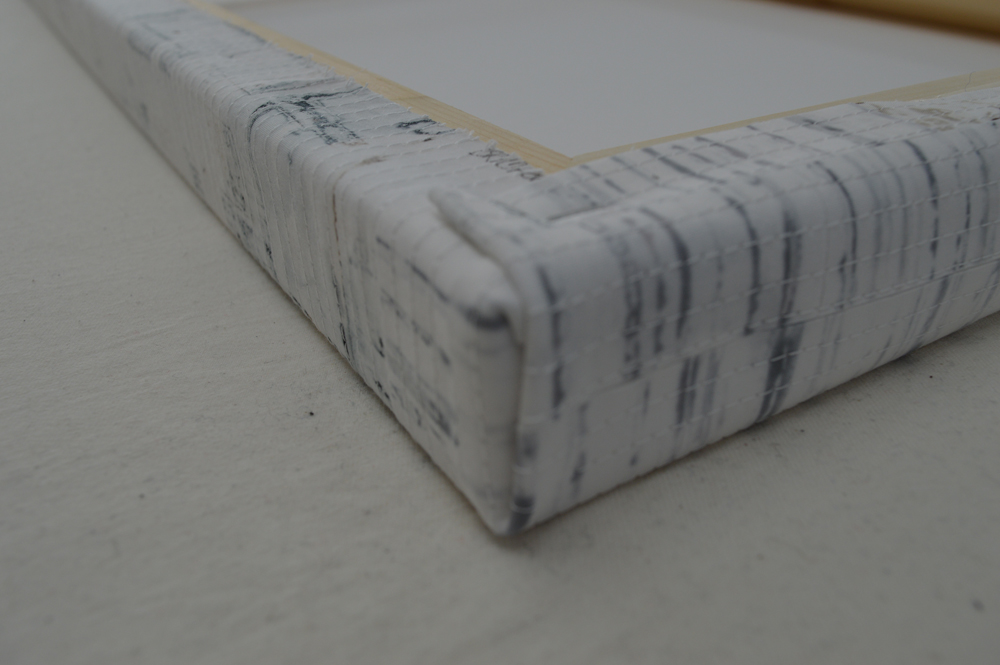
I love the finished effect, particularly how the stitched lines fold around the edges. And using deep canvases meant that I could stitch the name of each piece onto the side edge. I can't wait to see all 10 hung together!